
Mode reference
Anime Zero Game Modes
Choose Story for a defined act and its materials, Defend for a protection objective, or Infinite for a longer survival run. Raids have their own exclusive reward paths, and Update 3 adds the room-based Trials ladder. Mode and difficulty are separate choices; check the queue's actual objective, drops and requirements before starting.
October 2026 source scope, including reported Update 3 additions. Older videos count only some run types, so their three-mode total is not a complete current menu. No official level-unlock or fixed payout table is claimed.
Updated Independent guide
On this page
Choose by your next goal
| Mode | What you do | When it fits | What counts as completing the goal |
|---|---|---|---|
| Story | Progress through the chosen act’s enemies and encounter | First clears, progression and a named act’s material drops | Clear the act and reach its result screen |
| Defend / Defense | Protect the designated target against enemies | A protection objective instead of pushing through rooms | Finish its required waves while meeting the protection objective |
| Infinite / Endless | Survive successive waves and recurring bosses | A developed build that can reach later material opportunities | Reach your chosen wave/farming goal; it is not a finite Story-act clear |
| Raids | Clear a dedicated encounter for its reward pool | Shadow Monarch or Flame Director and related materials | Defeat the raid’s encounter and read its result; a weapon drop is a separate event |
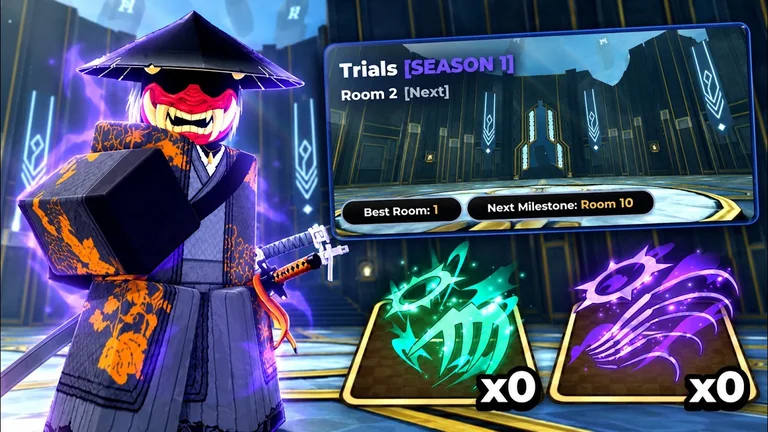
| Trials | Climb rooms composed of five floors, with a boss on the fifth | Room rewards, leaderboard goals and later unlock targets | Clear the required room under any stated solo/co-op condition |
The last row follows the dated Update 3 overview. Trials reports use both floor and room terminology; keep the exact reward-screen label when setting your target.
Enter a run
Use Create Lobby for the available run selection. Choose the mode, map, act where applicable, and difficulty. Not every mode uses a Story act, so do not apply an act number to a Trials room or a raid gate.
Before confirming, inspect the queue’s preview. The original Evolution guide directs players there to see the materials a stage can drop. For a specific recipe, select the act that lists the missing ingredient; the map name alone is not enough.
For Trials, the AllThingsHow guide uses the matchmaking area’s Trials menu and Room Rewards panel. Check that panel for your next target and reward before committing to a climb.
Entry labels and restrictions may change. The official Roblox description does not supply a mode-unlock level chart. If a menu requires a condition, use the current prompt; do not rely on unsupported level 25, Raid Token or Stamina rules attributed to that general description.
Difficulty and completion
References describe Easy, Normal/Medium, Hard and Nightmare as difficulty choices. These affect how demanding a selected run is; they are not four additional modes. Normal and Medium are alternate labels in the references, so follow the client’s actual label.
Choose a difficulty you can clear repeatedly. TechWiser recommends Nightmare Story when the build can handle it and Hard when Nightmare is taking too long. That advice is conditional; a high nominal reward is not useful if the act repeatedly fails.
Exact enemy multipliers and fixed coin/gem tables in older community summaries are not established as current values here. Use the queue and final result for the selected stage rather than multiplying a quoted value across every map or mode.
Clearing and leaving are different outcomes. Story completion means finishing the act’s objective. The Update 3 overview reports some payout when leaving during a run, but that does not prove the act cleared, the raid attempt advanced pity, or a required Trials unlock was granted. Check the specific result and reward panel.
Trials reward goals
The October 12 Trials reference lists both unit-name and class-name goals. These are reported labels and conditions, not interchangeable room numbers.
| Source’s grouping | Target | Reported goal |
|---|---|---|
| Unit | Rin Okumura | Trials leaderboard top 3 |
| Unit | Astra Yao | Room 175 |
| Unit | Frieren | Room 250 |
| Class | Silver Calamity | Clear Room 125 or higher solo |
| Class | Astral Blossom | Clear Room 150 or higher in co-op |
| Class | Void Arbiter | Clear Room 325 |
Ashira’s supplied narration independently emphasizes the solo condition for Silver Calamity and co-op for Astral Blossom. Check the live reward screen for reaching-versus-clearing language and current season conditions. A listed room number alone does not establish the reward has been claimed.
For co-op participation, follow the server and open-room guidance. For the distinction between these names and the older kit roster, open the character reference.
Update 3 room changes
The October 11 overview reports these changes:
- Matchmaking can join open rooms from other lobby servers, with an option in the queue.
- Story waits for a start vote before its first wave, with spawn protection during loading.
- Leaving a run can provide a partial payout.
- Trials rewards depend on clear speed, with an S-to-D rating described by the creator.
Room voting is not evidence that all modes have the same party limit. Roblox’s 20-player server capacity remains a separate fact; the multiplayer page explains that boundary.
Use the dungeon guide for repeated material runs, and the raid guide for exclusive weapon goals. This mode reference helps choose the run; it does not replace those procedures.
Sources & scope
Game rules below are attributed to their publishers and creators. This site has not independently playtested them.
- Ashira RBX Update 3 overviewTrials structure, reward goals, room matchmaking and Story start-vote changes.
- Games.GG Evolution guideStory act material previews and the use of later Infinite waves.
- TechWiser progression guideDifficulty selection based on whether the build can clear reliably.
- AllThingsHow Trials guideReported unit and class goals, room rewards and Trials entry.
- Provided mode referenceCommunity description of Create Lobby fields and regular objectives; exact uncorroborated payouts are not treated as official data.